

With so many creators on TikTok making hairstyle creations look easy AF in 20-second videos, mastering your own hair can feel pretty intimidating. But even if you have absolutely no experience doing hair, there are some easy hairstyles for beginners that nearly anyone can do. Remember, what might look good on a celeb or TikTok star might not work with your vibe or aesthetic, and that’s totally OK! Instead of getting discouraged, try to have fun experimenting with styles that suit your unique personality. If you need help getting started, we’ve rounded up a few easy hairstyles for beginner stylists to master.
About the Experts:
Aviva Jensen Perea is a celebrity hairstylist and founder of DAY RATE BEAUTY, a hair accessories line.
Shann Christen is a trichologist and founder of BIOMETHOD hair care.
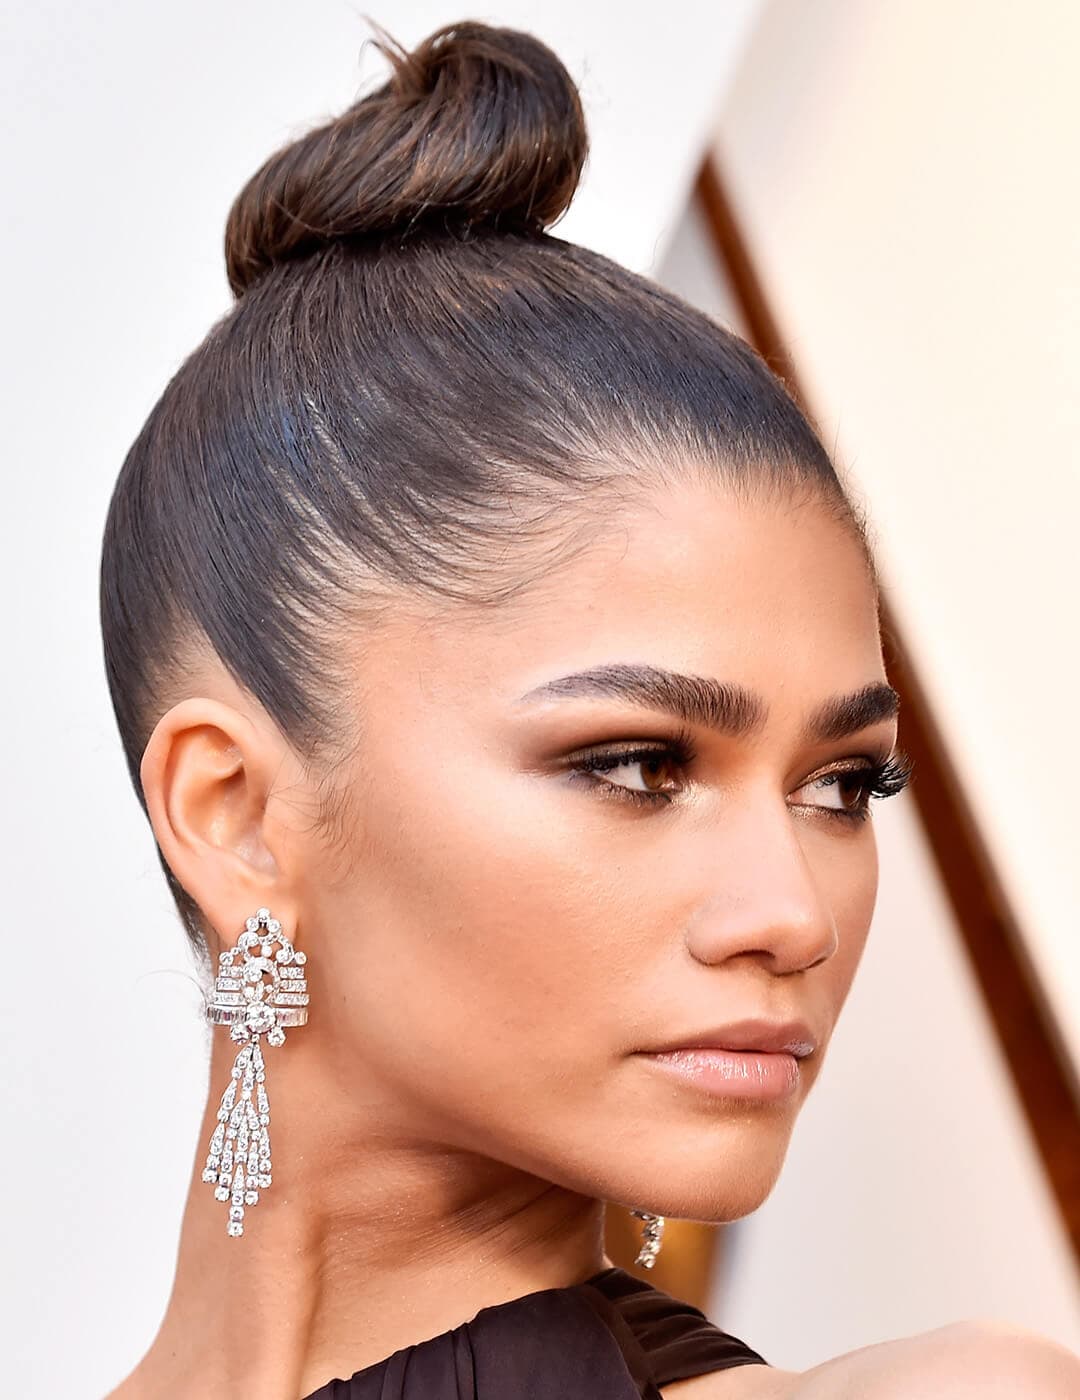
1. Teased Hair
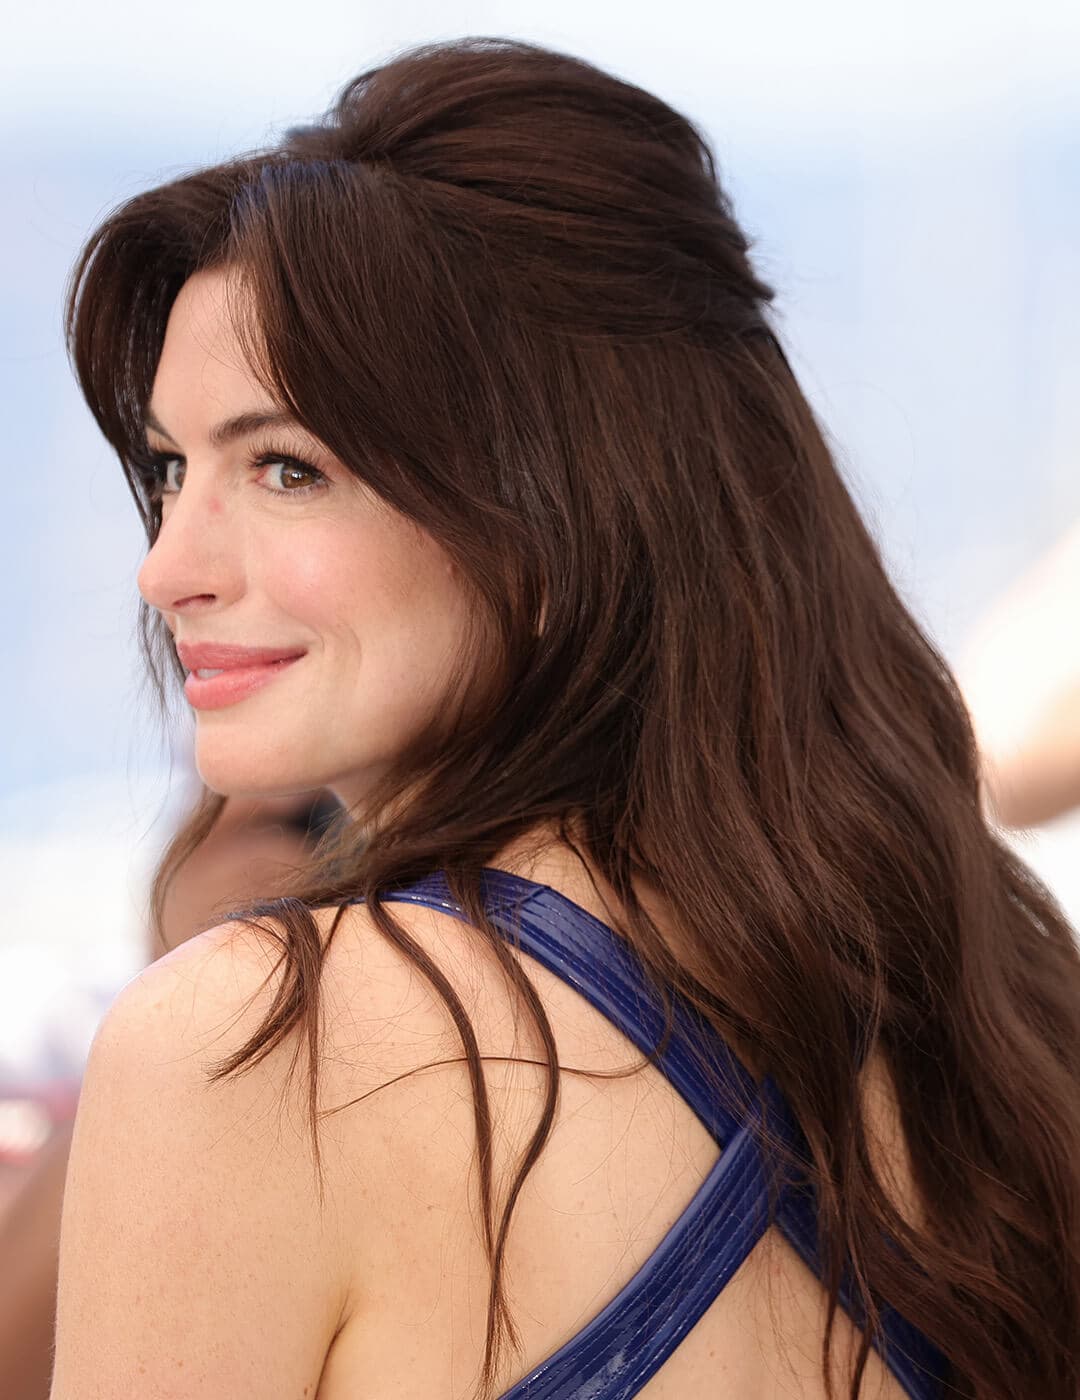
The truth is, you don’t have to be a southern belle to love a teased hair look (although you know what they say about the higher the hair…). In fact, we love teased hair for modern moments, like how Anne Hathaway rocked it for the “Armageddon Time” red carpet last year. Teasing your hair is actually so much easier than you might think. Simply grab a flexible-hold hairspray (we love NOT YOUR MOTHER’S She’s A Tease Volumizing Hairspray) and mist the roots on sections you want to tease. Then, grab a fine comb and gently backcomb the section towards your scalp. After you’ve teased, don’t freak out—it’s going to look a little wild. You can use the comb to gently smooth over the top layer that’s visible.
2. Bouncy Pony
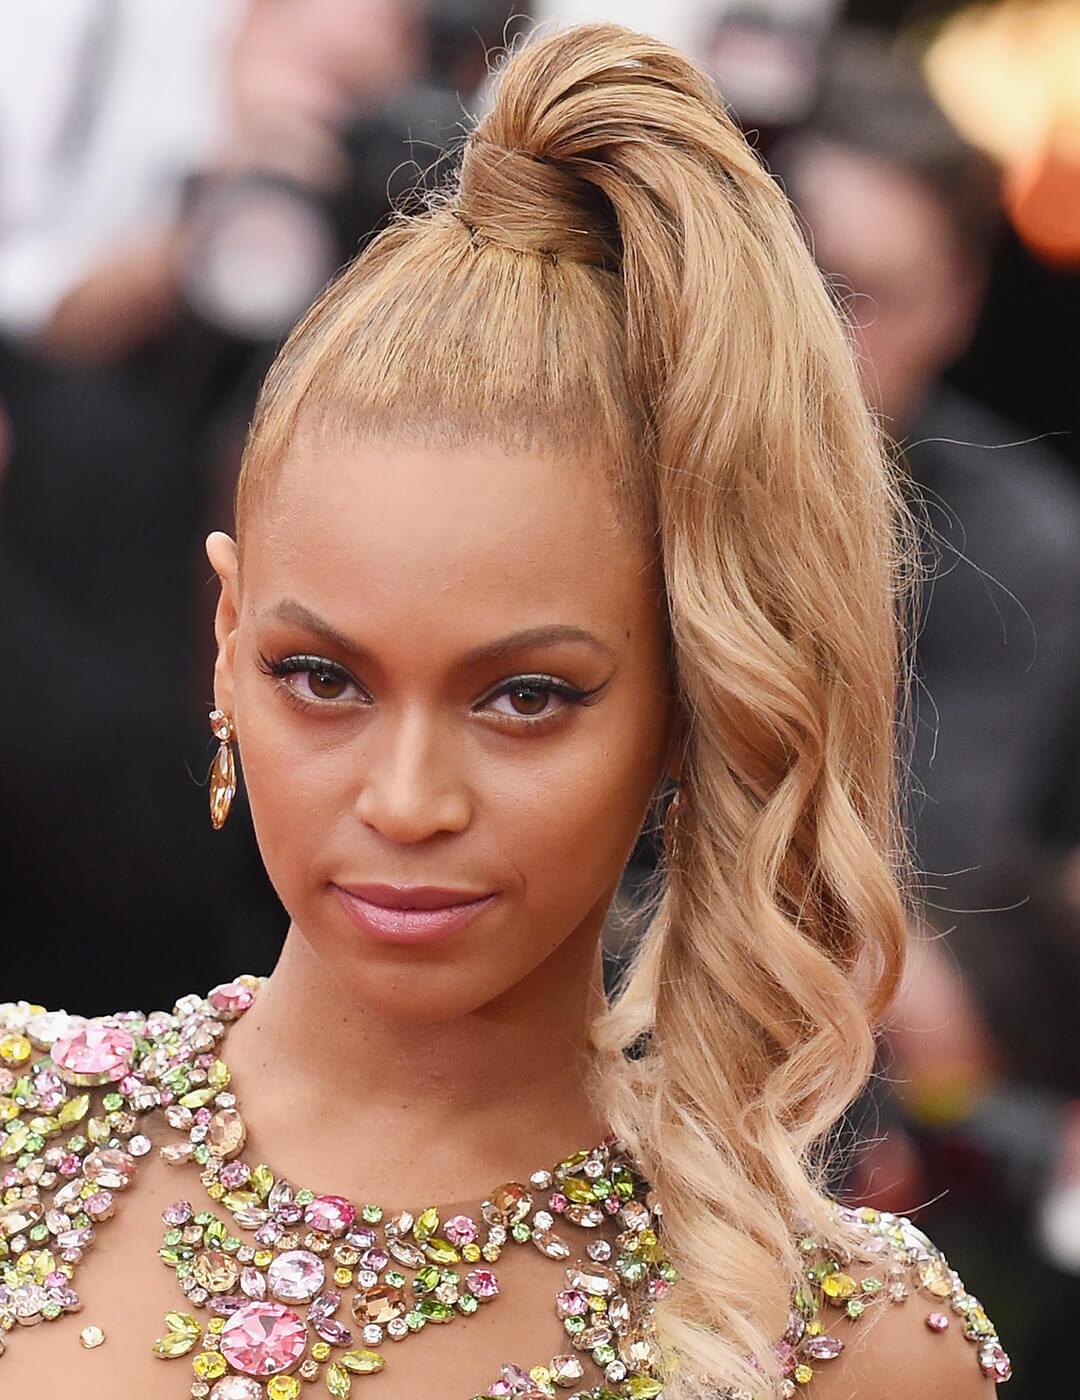
“This is the perfect example of a style looking difficult but actually being perfect for beginners,” says celebrity hairstylist Aviva Jensen Perea. “The trick is a glossy finish and a flip at the ends.” Perea recommends starting by gathering your hair into a ponytail at cheekbone height, which is a universally flattering pony position (or go super extreme like Beyoncé at the Met Gala!), and secured with an elastic. Then, curl the ends of the ponytail with a medium-barrel curling iron all going in the same direction. “Tease the hair that is coming out of the elastic for extra volume, and then smooth out the top.”
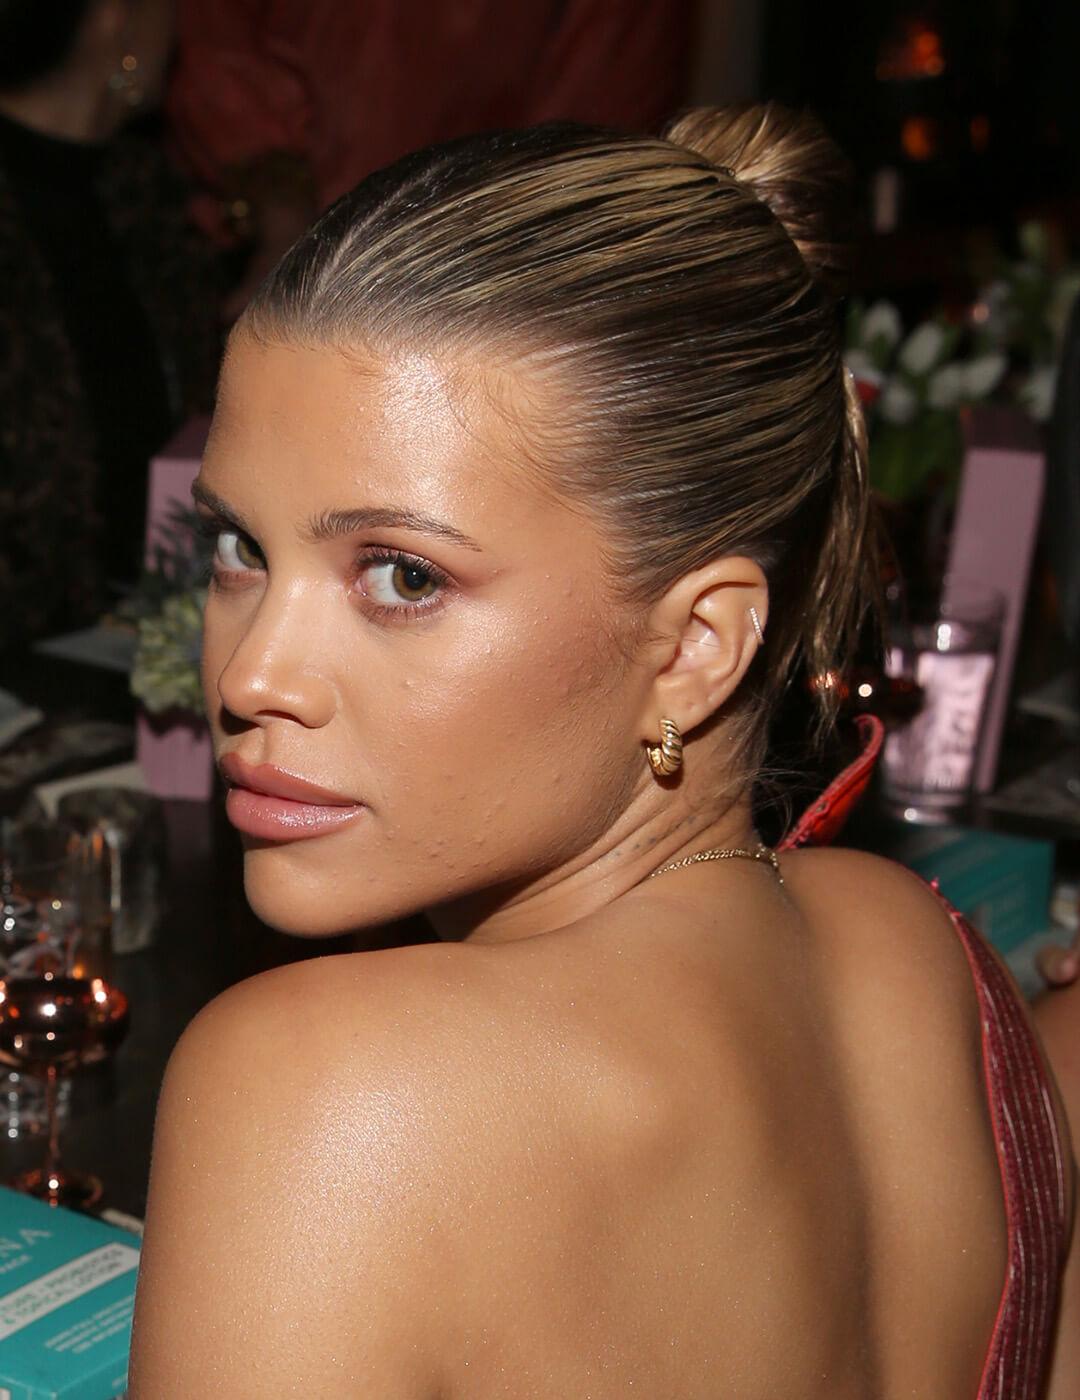
3. At-Home Blowout
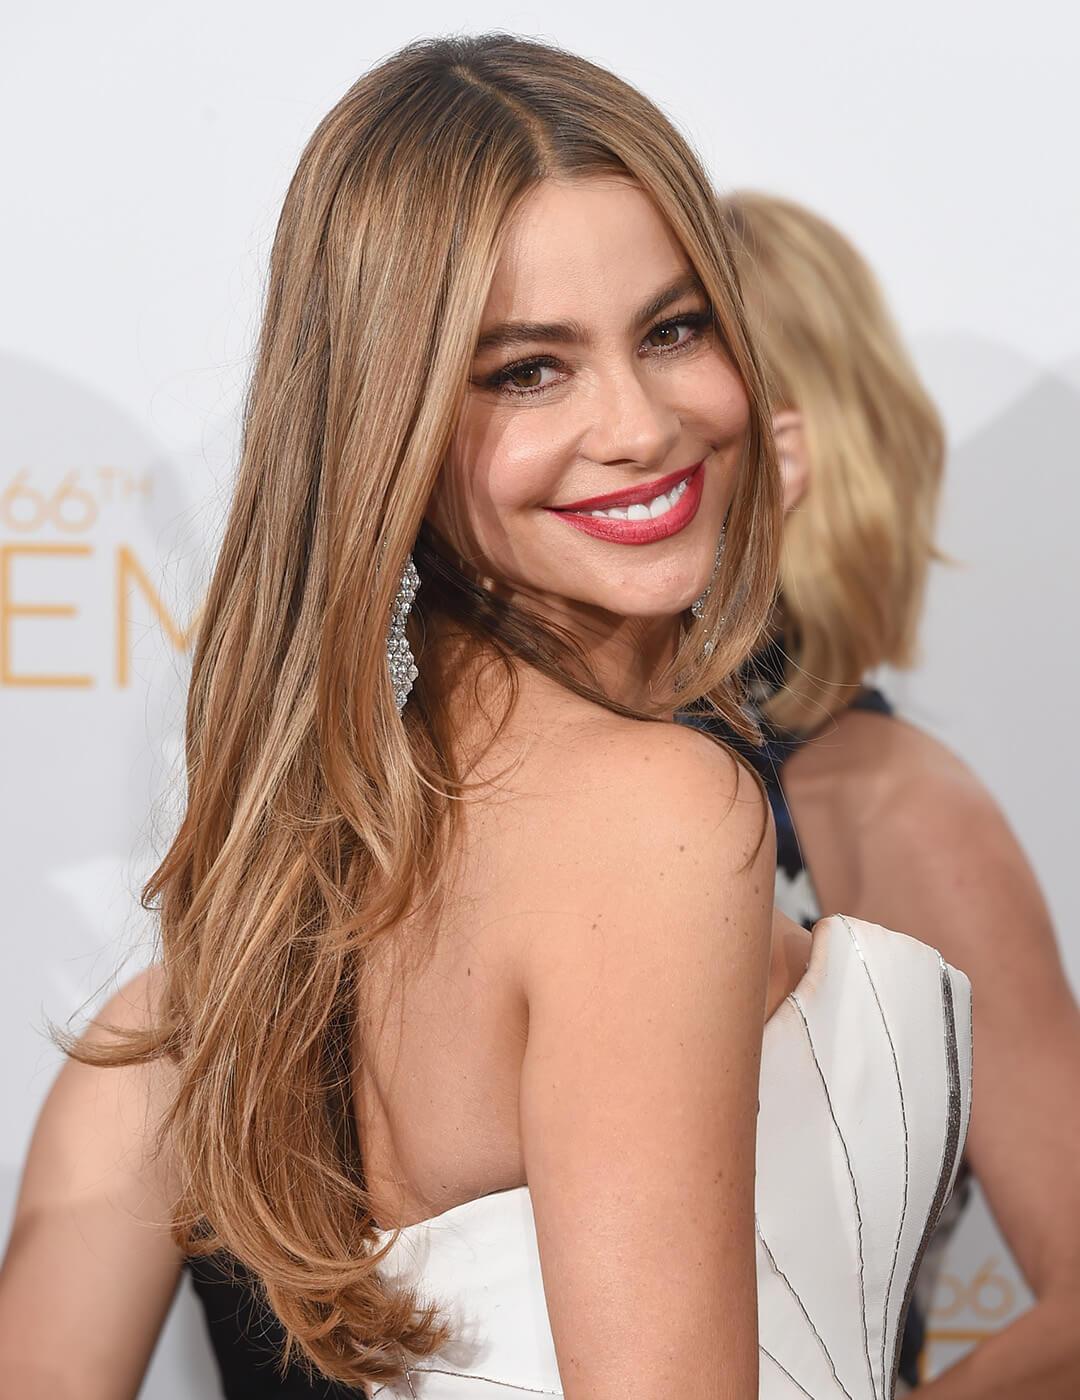
We know blowouts are usually synonymous with paying a visit to the salon, but trust us—you can create one just like Sofia Vergara’s at home. First, use a heat protectant serum or spray to protect your strands from heat damage. For this, we love the I.N.H. HAIR Flame Fighter Heat Primer, which you can spray on dry or damp strands before you apply heat from the blow dryer. Grab a barrel brush and work in sections throughout your head to slowly pull the brush through as you apply the blow dryer to hair. As you get more comfortable with at-home blowouts, you can twist the brush to create curls, bounce, and volume.
4. Easy French Twist
Andra Day’s one-and-done French twist is perfect for second-day hair and works on every hair type. “Take some dry shampoo and spray at the roots six to eight inches from the scalp, and shake it through to create a lived-in, piece-y texture,” says Perea. “Gather your hair into a pony at ear-lobe level, and with one hand, hold that pony shape in place; with the other hand, start to twist your hair until you reach a point where it starts to twist on itself.” From there, coil the rest of the hair into that twist and insert a large U-shaped hair pin like the DAY RATE BEAUTY Petite Power Pin through the twist. “This sounds complicated, but it’s actually the same principle as using a pencil when you were in grade school,” says Perea. “The look is pulled together and takes about two minutes to achieve.”
5. Snatched Top Knot
This is an easy, on-the-go style, and your hair doesn’t have to be clean (in fact, the dirtier the better!) to achieve this look. “Gather your hair into a pony at the very top of your head and secure it with an elastic,” says Perea. “Split the pony into two to three sections and start coiling them and twisting them around the elastic, then secure the hair with small U-Shaped hairpins. Take a clean mascara wand and spray with super hold hairspray and clean up the hairline.”
6. Straight and Sleek
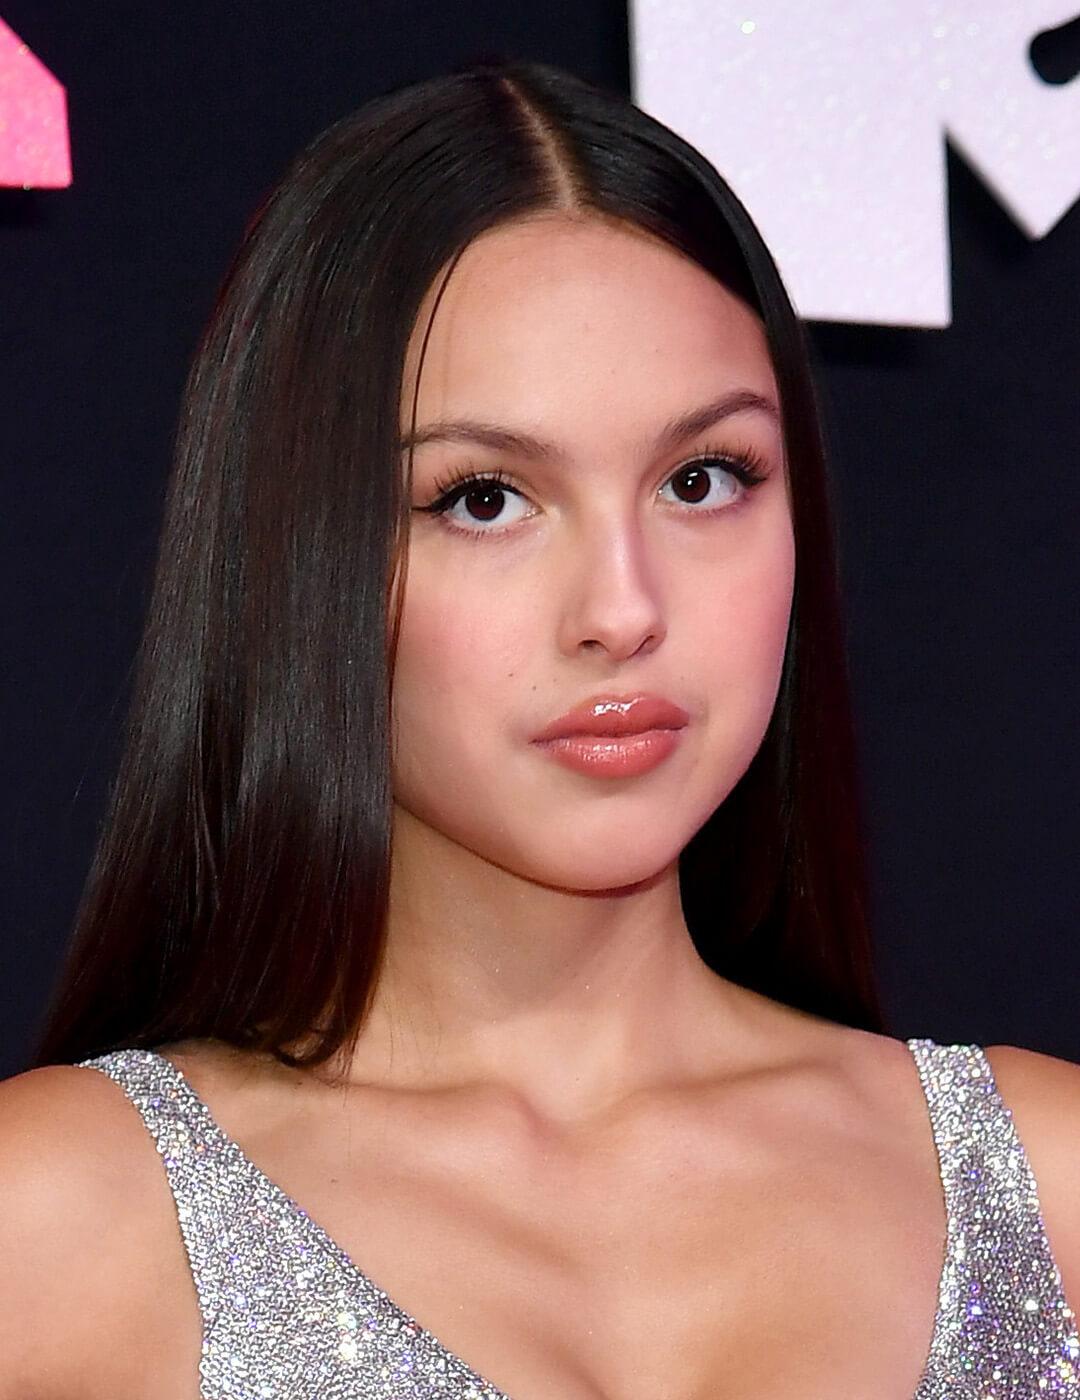
Hair expert Shann Christen says hairstyles that require a hair straightener are a great place to start for beginners, and one look at Olivia Rodrigo’s curtain of glass hair has us agreeing. You can blow dry your hair straight, or opt for a straightener. “When using a tool like a flat iron, do not start at the hottest setting,” he says. “Most irons will go to 450 degrees. This is too hot for styling. Turn the temperature down, start at 250 degrees, and I bet you will achieve the results you desire.” Tip: Remember to keep the iron moving down the hair shaft—never up and never held in one place.
7. Curling Iron Curls
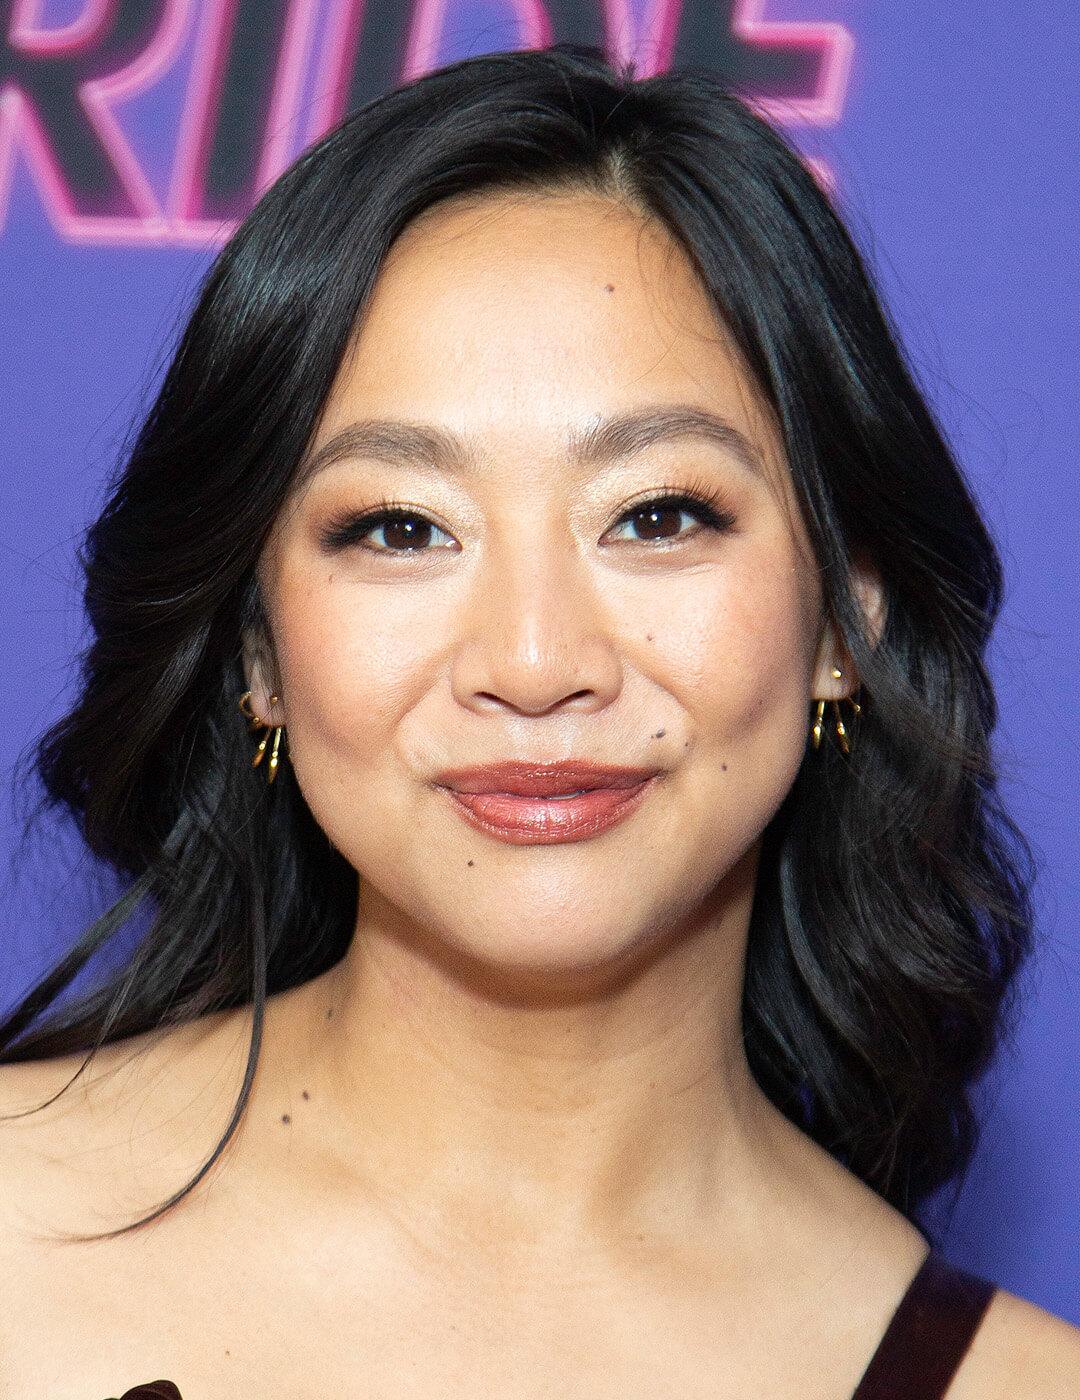
Christen loves a curling iron style (like Stephanie Hsu’s) at home, but like with a straightener, he says to make sure to turn the temperature down on the lower side. “Wrap the hair up towards the scalp first, and then twirl the iron toward the ends, which will help prevent the ends from burning up and splitting from the prolonged heat,” he notes. “As with any hot tool, a heat-protecting product is very helpful, but this is especially true with the curling iron. Over time the heat on the ends will eventually cause damage, so minimize this with a heat protective cream or balm.” We love the BRIOGEO HAIR CARE Farewell Frizz™ Blow Dry Perfection & Heat Protectant Crème to protect from the heat and tame frizz at the same time.
8. The Sophia Richie Bun
There are so many tutorials on TikTok on how to do this bun, and it’s a great style to wear your hair in if you want to leave a hydrating repair mask in your hair for a few hours. If you do this, we love the SLEEK'E Silk'e Repair Therapy Deep Conditioning Mask. Keep two large front sections out of the bun and twist them forward and out of the way. Then using your fingers, apply the conditioning mask into strands, making sure they’re all evenly coated. Then, pull the hair back into a mid-bun and secure with elastic. Pull the two front pieces back, keeping your middle part defined, and secure each piece back into an additional elastic.
Read entire article here https://www.ipsy.com/blog/easy-hairstyles-for-beginners